DIY Ikea Hemnes trundle bed transformation
Well, this is not my first DIY rodeo, and I thought I’d put it up on my website to take a break from ALL OPERA ALL THE TIME. I have done numerous projects on our apartment (and on my friend Keith’s apartment in Houston when he first moved in, come to think of it!), but this is the first time I decided to actually blog about it, since the project has taken forever AND has taken a lot of effort.
The main reason for my slow progress has been my pregnancy (yes!! really!!) We await Miracle Number 2 in mid-July (2019). No, I’m not just making excuses for gaining some weight! 😉 Excuse numero 2 for slow progress – we have all had the horrible stomach flu that our Miracle Number 1 brought home from playschool. Grrr. The Ikea boxes have occupied the front hall for a while now… Excuse numero tre is that I bit a helluva lot more than I could chew (what’s new?!) and ran into a lot of difficulties because of the hardness of the MDF in the structure of the Ikea bed.
I had hoped to have had the bed ready and in the guest bedroom (actually the baby’s room, but we can’t seem to pry him out of our bed yet at 1 1/2 and he’s too cute to do otherwise…). So our intended first guest on it, ironically enough, KEITH, had to sleep on the pull-out couch because the new bed is in pieces all over the apartment.
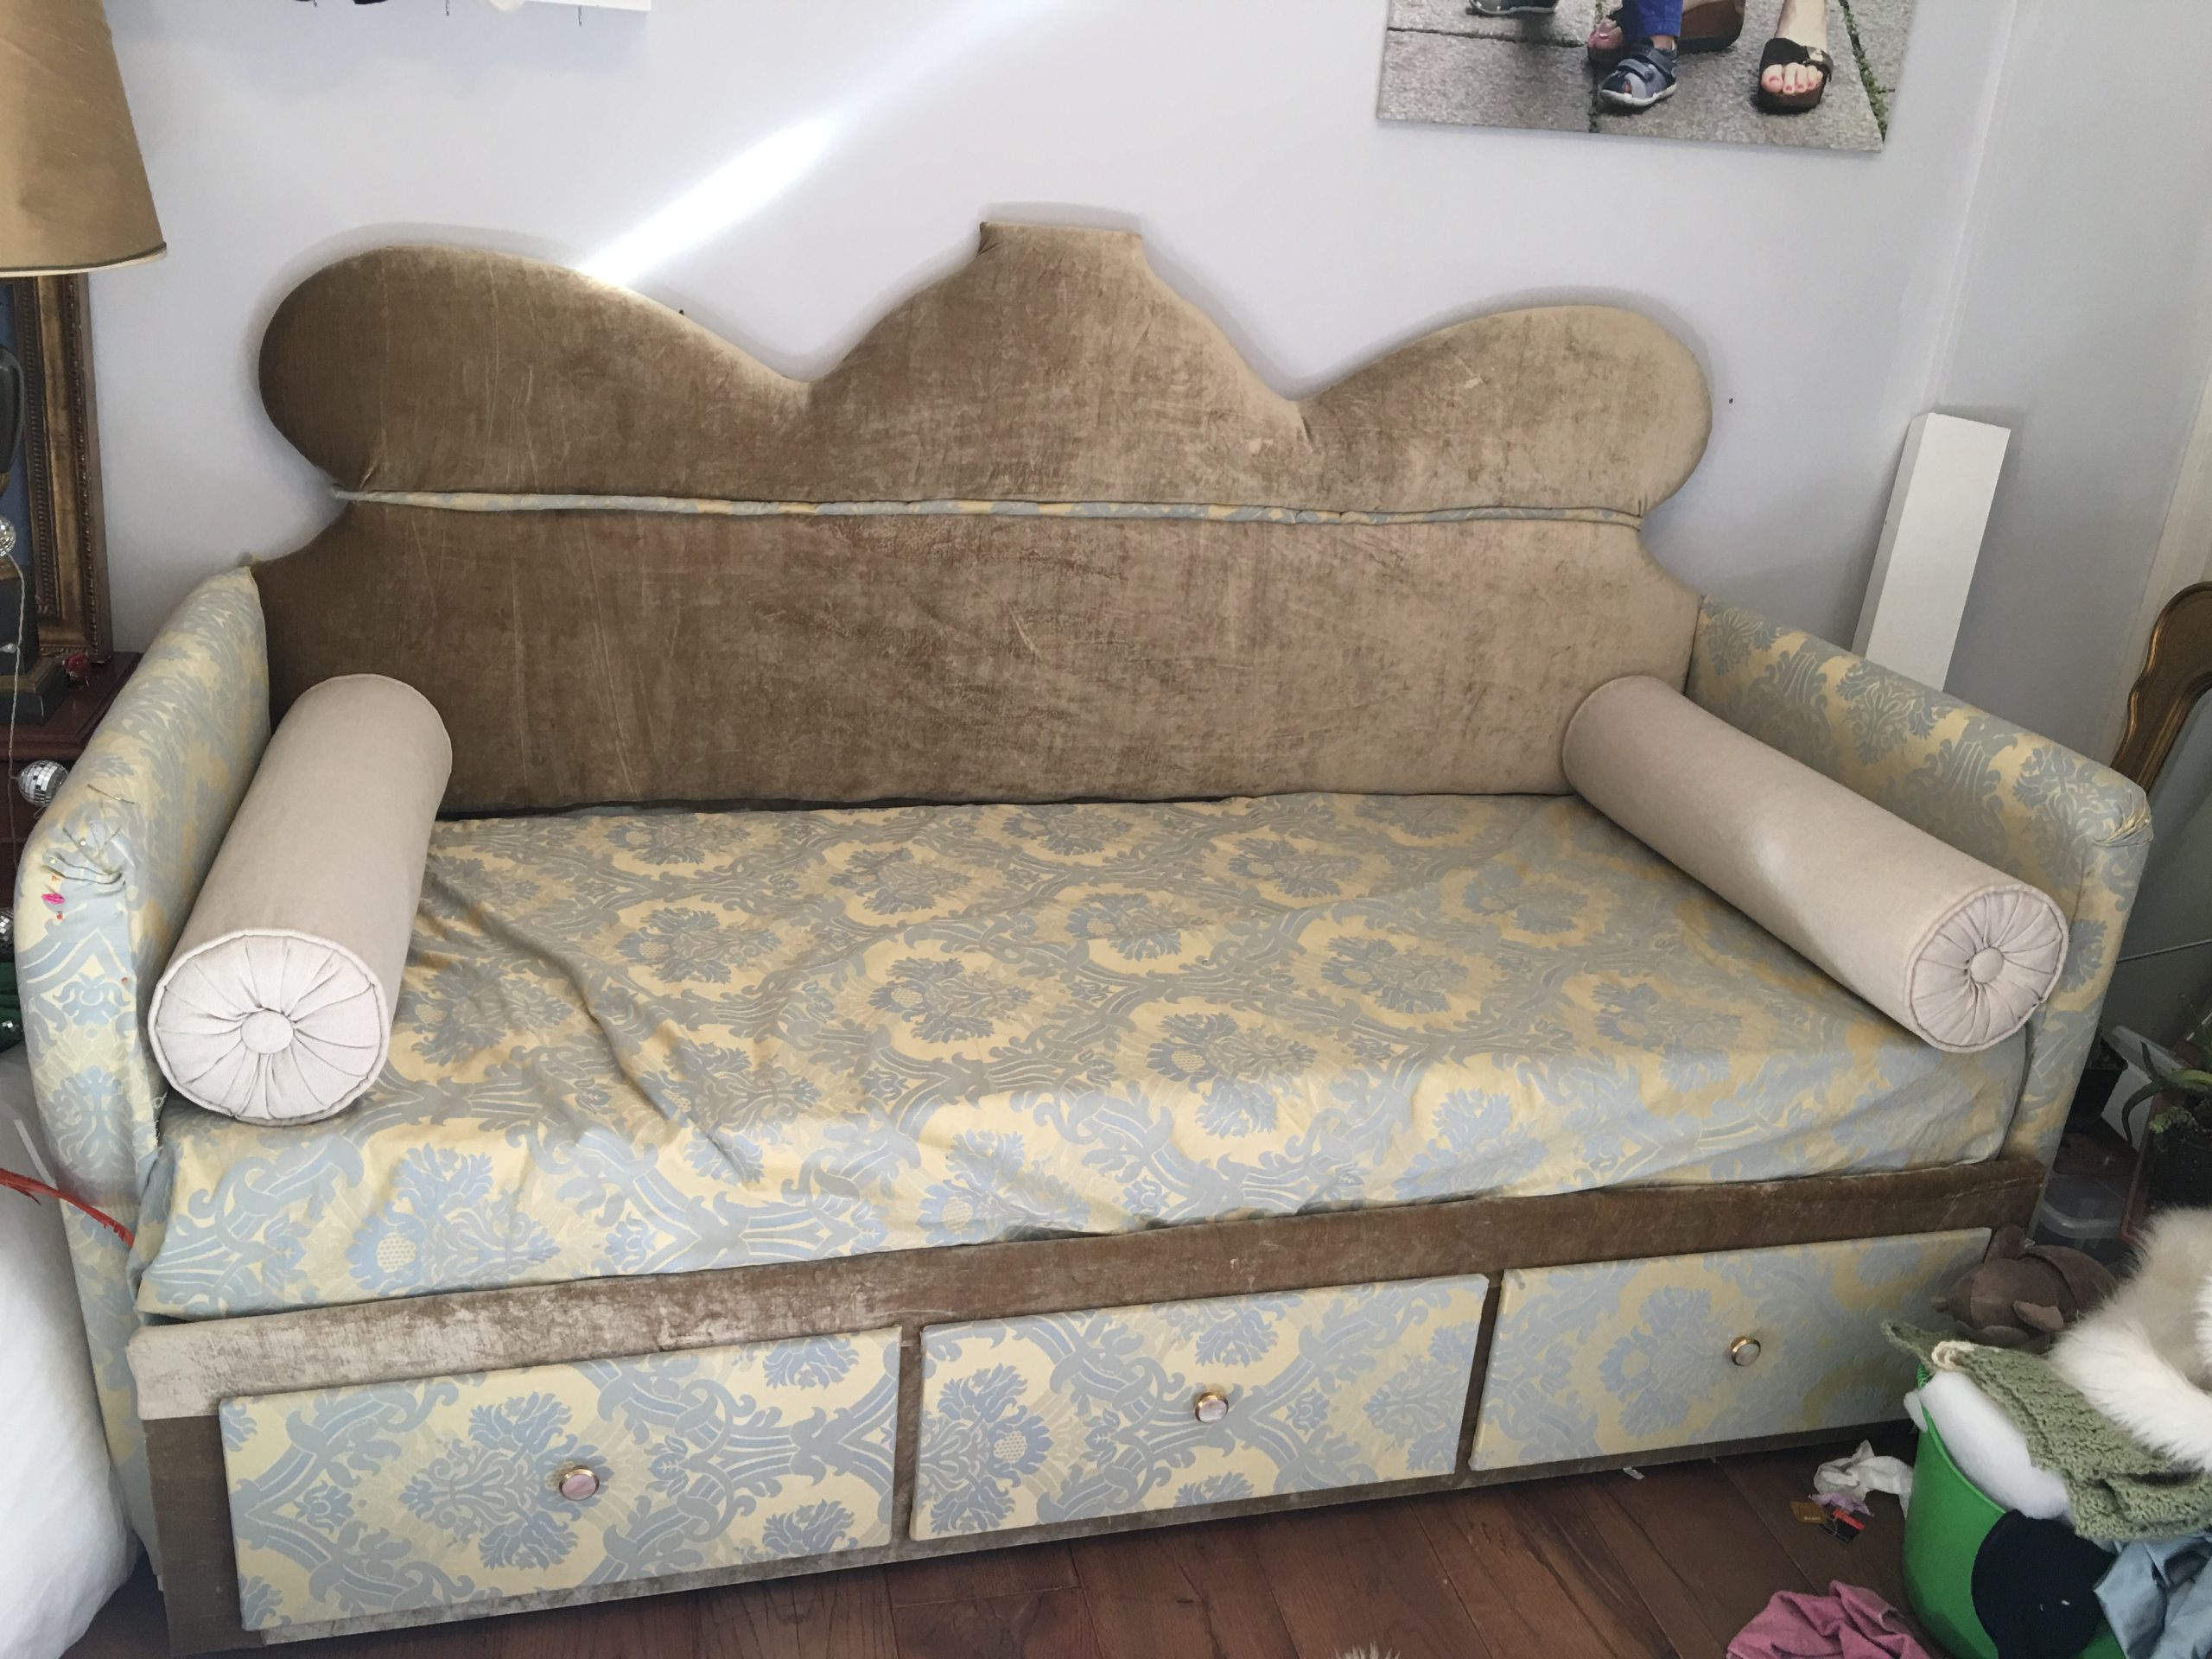
Now to this exhaustive and exhausting hack – it all starts with an Ikea HEMNES hack that I saw online (here, and here). (mouse over and you’ll see there’s a link!) The original Ikea Hemnes looks like this without mattresses.

It’s a trundle bed with drawers underneath, and you’re supposed to put the two super skinny mattresses on the single bed when it’s all closed so it looks like a day bed, which means you’re supposed to use a really skimpy mattress, which we didn’t do. We used two very nice hard single mattresses with a soft memory foam queen sized topper for when we open it up, and we keep the extra mattress + topper in the closet when it’s closed, which is most of the time:
Here are the two hacks I found online, which only involve the headboard part (the back of the bed.)


However, for my taste, the first one looks a little weird with just the back upholstered in another color- and the second was just a store-bought headboard that cost more than $300 and was sort of stuck on the back. I call cheating! ha ha! (She’s smart, but I didn’t want to spend that kind of money and had some material I wanted to use!) No offense to Hack Number One, as she also blogged in detail about how she did it, so thank you! I’m sure mine won’t come anywhere near as professional-looking, so take my criticism with a big dose of salt…
MY PROJECT: I decided I wanted to upholster the back, sides and the front face where the drawers are. And change the knobs on the drawer pulls, of course. 😉 Easier said than done… I tend to bite off more than I can chew, and then never finish a lot of projects. This one can’t be one of those, as we need a bed in that room!
The Ikea assembly has three different parts – the back of the bed (headboard) structure, the middle trundle pull-out part, and the front drawer part. All the pieces in the Ikea assembly need each of these pieces I wanted to upholster to hold each structure together. So at first, I thought I had to finish the upholstery BEFORE putting any of it together. I needed to leave space to connect it to the other parts, so I couldn’t put anything too bulky at the joints. And I didn’t want to bulk up the sides of the drawers too much so they won’t shut, as they don’t have much room between each of them and might not shut if they’re too heavily upholstered. But then I realized that I COULD assemble some pieces and then upholster them so I didn’t have upholstery in the joints I needed to join. So, yay. Then came actually doing it!
1.Decide Headboard Shape:
I had to decide what shape to make the “headboard” part of the bed in the back. I did not want to leave it rectangular, and I wanted to pay homage to the era – 1900 – and style of our apartment, which is Torino Liberty (Art Nouveau). Here is some inspiration for the shapes.


I finally decided on a pretty simple design (hahahaha!), to which I will eventually add a sort of “marquee” at the top with a small antique piece from the right time period I found in a market. CURVES are so Art Nouveau. But CURVES are absolute hell to get right with upholstery if you’re not a professional. And I am not. And I screwed up measuring it, so I ended up with a headboard with a seam through the middle where I had to cut it down after having already upholstered it. ARGH.

2.Mockup of headboard:
On butcher paper, I made up a mock-up of the piece I wanted to add and checked it against the original back so that it wouldn’t be too high in the end (and I would have enough material to cover it.) Here, I made a deadly mistake – – I measured the back as if it went from the floor up. I hadn’t taken into account that the original back (with all the holes to connect it up to the sides to the Ikea base) is assembled about 40-50 cm higher than the floor. You’ll see what I had to do in my ERRATA section way below. Ugh.
Again, my design has a LOT of curves, so I would dissuade anyone who doesn’t want to pull their hair out over upholstering it from doing anything similar. :-\
3. Choose upholstery materials –


I had some pieces of upholstery material that had been sitting around, calling for a project for a while, and the one I wanted to use for the back is a gold velvet that isn’t very big, and it’s actually somewhat damaged with lines and things that won’t come out with ironing with a velvet board. Of course I only figured this out after steam ironing the damn thing all night with a velvet board. Since I don’t have much of the gold, I wanted to see if I could use the bits left over to cover the back part of the frontispiece behind the drawers. I would cover the drawers in the material I would use for the sides (a damask in light blue and gold.) Unfortunately, there wasn’t enough velvet to do tufting. Natch! It will have to be just plain velvet. Since it’s the kid’s room, I am thinking it won’t stay pristine for very long, in any case… In order to cover up my crappy upholstery job AND the defects of the material, I may add studs to the design. If you want to tuft, you’ll need at least 10cm extra on all sides of your fabric. Check out the tons of tufting headboard tutorials online… Google is your friend.
4. Constructing the addition to the headboard: Then came some hard work, which unfortunately I didn’t photograph because I didn’t take my phone with me to the basement. I had two big wooden boards that were thick enough to match the thickness of the back of the bed, and they were each 110cm x 90cm, so together would match up with the back of the bed, as it is is 200cm (2 meters) long.
I went down to the basement, cut out one half of the butcher paper design and traced that on to the first wooden piece I would use as “the long side.” I didn’t want to have the pieces be exactly the same that I would be joining together, so used the full length of one (110) and then cut the second board to 90 in length. I carefully cut the design onto the first half with my jigsaw, and then put that board piece on top of my other piece of wood and traced that onto the other piece. Then I cut that out with the jigsaw, as well.
I took them back upstairs and looked at them against the existing original rectangular back piece, and decided I would leave a little bit more height than what I’d planned. (WHY?? WHY??? GRRR!) I marked a line across the bottom of both pieces to cut, and then (freezing basement again) used my circular saw and cut off the extra height from the bottom of both pieces. I then put the smaller piece on top of the larger piece, matched up the cut edges, and electric sanded the sides of both pieces until the edges all matched and things were smooth. Not perfect, but at least it wouldn’t give me splinters... I only realized after having upholstered the piece and then assembling it with the sides that the thing was going to be waaaaay too hugely high. Especially for a baby’s room! Measure three times – including the 40cm extra or so from the floor where the headboard part will attach to the sides!
5. Adding additional piece to original headboard.

honeybearlane’s tutorial since I missed photographing my hole-making bonanza…
Then, back upstairs again, I drilled corresponding holes in the top of the new pieces where the peg holes in the top of the original Ikea back piece had them. (Normally you will put a top border on it with those pegs, but I decided to use the pegs to attach the addition on top of the original piece.) I attached the two new pieces together in the middle with two brackets on the front side, since the bracket profile was minimal, and made sure the screws did not poke out the back. Then I “pegged” the two pieces (new on top of old) together. They’d look perfect if that bottom piece actually went all the way to the floor. ARGH. “Measure three times, cut/construct ONCE.” I didn’t follow that advice…
6. Stabilize headboard for good measure:

Then for good measure, on the back I screwed on some more metal braces that I doubled up to reinforce the joint between the addition piece and the original back, as I wasn’t sure the pegs would really be able to hold all the weight of the additional piece above it without anything else. Since people will be leaning back on the backrest (headboard) and it will not go exactly up against the wall because of our decorative baseboards, I thought it was a good idea to be prudent. (I had started off using boards to do this, but they were a little warped, so they didn’t work so well…)

7. Upholstering the headboard!. – –
-

original design – half cut out -

trace onto foam -

cut foam -

closeup – careful not to cut on angle!
There are tons of tutorials on this online – just google search it, as I’m too lazy to find you all the wonderful tutorials I found online. They all look so easy and have time-lapse photography or great videos, but it’s damn hard! And takes forever to do everything. And first, you have to FIND ALL THE SUPPLIES. I had to go to a professional upholstery supply place here in Italy to find all the stuff, and they think I’m a total weirdo to want to do it myself. I spent about 100$ on supplies. There doesn’t seem to be a lot of real DIY here in Italy. Maybe because they still have real artisans, not opera singers who are winging it with power tools!
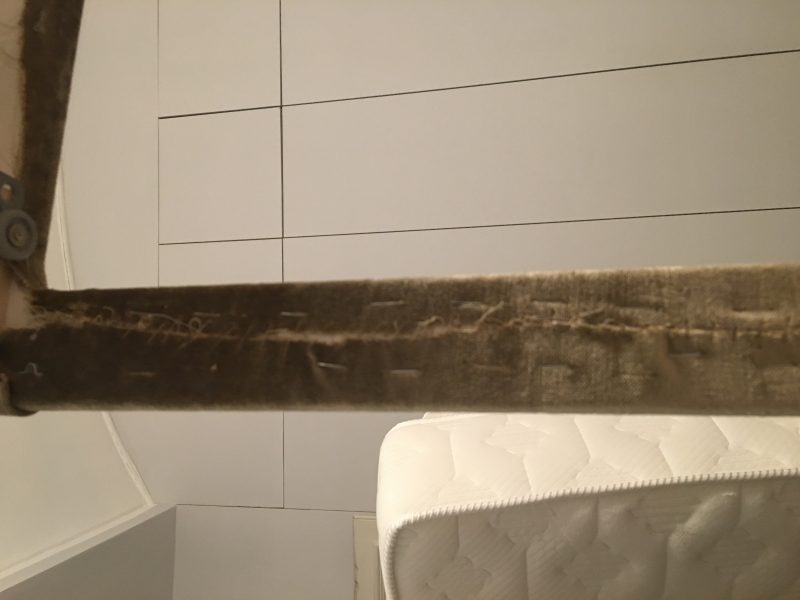
Also, make sure you are stapling above the holes that attach it to the rest of the assembly! I attached the batting AND the material about an inch above the holes on the bottom of the original piece of the back of the bed, as it will be covered by the mattress, in any case. That way, I didn’t have to worry about assembly later. You need to know how high of a mattress you will be using, so you can gauge how far down you want to bring your FOAM, most of all. I had to reupholster the bottom twice because I had too much foam down too low and it pushed the mattress out too much. Then I cut it back a little bit too much, so it’s not perfect now. :-/
First, the headboard: add foam cut out to your shape, then staple polyester batting on that, stretching it around to the back, then add your material, do the same and staple that on the back. Easy peasy, right? Shoot me now.
You should cut your upholstery material down to about 5″ bigger than the shape of the headboard. Don’t do what I did and assume that 5 inches is a lot smaller than it is. :-{ You may need to cut some “v” notches in the material at corners and curves, but watch some tutorials to figure that out. I had to figure out how to create “fingers” across the back of my big curves, as I couldn’t figure out how to pull that material taut. IT IS HELL. Here is a tutorial on a curved cornice that shows you how to do that. I must urge, as do ALL the tutorials, not to have steep curves in your design (like I did), as they are making my life impossible to upholster them.
TIP: Something that was a big help for me was making a line of “temporary staples” on the edge of the front of the headboard (turn your stapler a little to the side when making the staple, and one side will stay up, and it’s easier to fish out with your needle-nosed pliers later!) Then you can easily pull the “tails” of the fabric behind that around the back and staple them for real once you’ve figured out what doesn’t look like crap from the front. Then fish out your temporary staples, and voilà – you have a smooth front! I will also inform you that putting staples into the original Ikea MDF wood is a LOT harder than putting it into the real wood I had added on. Make sure you are pushing REALLY hard and straight into the MDF for the permanent staples or you will end up with “temporary” staples instead. And the wonky ones WILL come out later, so don’t just leave them there. Take them out and put them in again straight. When I finished everything, I took a hammer and felt around for anything sticking a little bit up and battened it down. I trimmed down the fabric on the bottom of the headboard so that I could add the track for the wooden slats of the bed.
-

proud of my batting -

back side of headboard with velvet on floor -

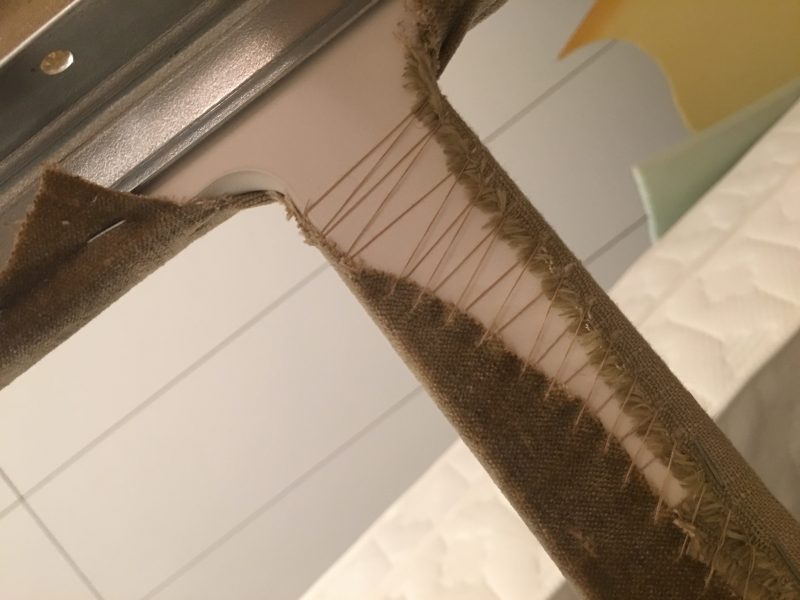
my attempts at “fingers” to ease the curve -

closeup of one of the “easier” curves with notches and “fingers” to ease the curve
Some people do a “base” material, then their “good” material on top of that. This gives them more practice. So if you’re a newbie, I’d suggest this so you don’t screw up your good upholstery material. I’m not a newbie, but wish I’d done it since the curves are super duper (almost impossible) to get straight. I even fought with used Curve Ease, having put it in upside down to begin with and then having to pry all the staples out… to try and get the curves into some decent shape. Here’s a tutorial on Curve-Ease.

8. THEN – ASSEMBLY. Get your little Ikea Allen key out, and a Philips head screwdriver, and go for it. HAHAHAHA! Of course I’m kidding – it’s not so easy.
I had been building the Ikea pieces I could put together that didn’t involve upholstered pieces, since during nap time and certain hours, I couldn’t use power tools. 😉 Since our houseguest had meanwhile left town, I was a bit slow finishing this project. Plus, nausea… Whoever called this “morning sickness” should be shot for false advertising. Mine is all day, and I’m into the fourth fifth month. Yuck.
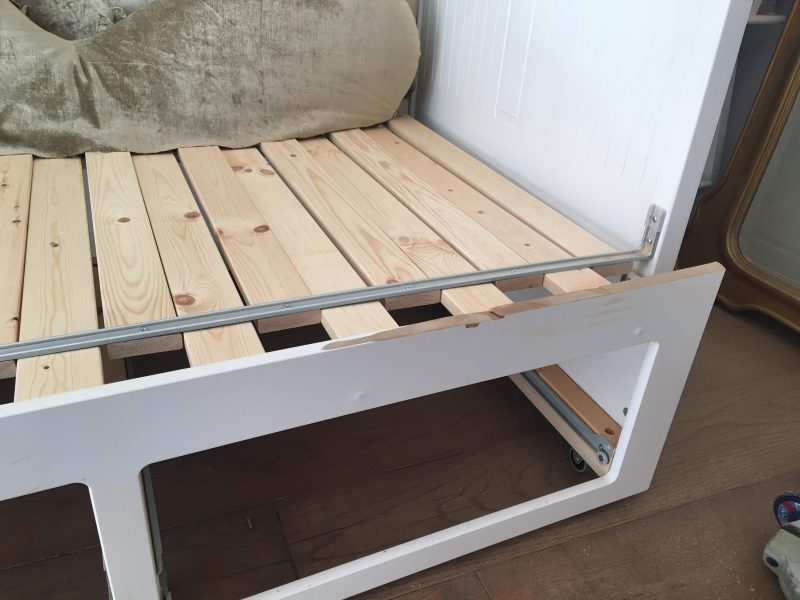
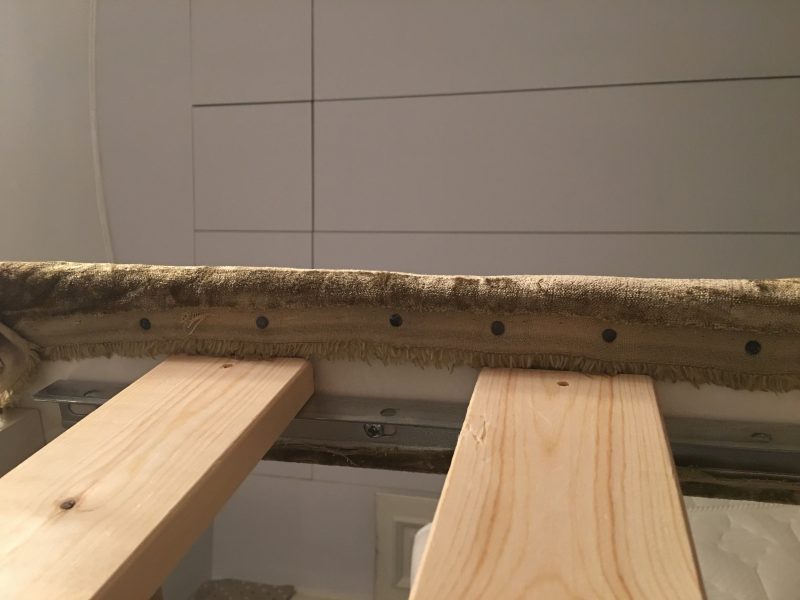
I also adapted the Ikea construction for the slats under the mattresses, which were supposed to have only little pegs that kept them in the holes. (and they bounced out very easily when a mattress isn’t on them.) Instead, I ordered some more screws from Ikea and screwed them ALL down. You can find out the order number of the screws by looking at the assembly instructions. It’s a lot more work to put all these screws in, but Ikea will send you extra parts (for free, at least here in Italy) if you order them online on their website, and your bed will hopefully be more stable. You used to be able to get them directly at the store, but now it seems you can’t, and you have to order them online. Save yourself the trip! You need to do this before upholstering the frontispiece of the trundle, so get it done while you can easily get to the holes, etc… and can still turn the piece around if you need to. I am still trying to figure out a way to stabilize a bit better the aluminum/metal parts holding up the slats and mattresses, as they seem a little flimsy. I have seen reports (critiques) of this bed that the slats break. Hm. We shall see with my guests! And word to the wise – DO NOT LET ANYONE PUT ANYTHING HEAVY ON THE BED WHEN THE TRUNDLE IS NOT ALREADY UP UNDER IT! IT WILL BEND THE FRONT METAL PIECE!! AND CERTAINLY DO NOT SIT ON IT! No matter how tired you are and how inviting it looks!
ALSO, remember there are holes in the side of the headboard! 🙂 I had to feel through the batting and the velvet as I went, and made holes there so I could attach it to the side pieces. I decided to assemble the pieces, and THEN add foam, batting and upholster the sides.
9. Assemble with sides –

I needed my husband’s help on this, as everything got really heavy, and hey, I’m pregnant, so better safe than sorry. We had to prop up the bottom of the headboard (the top of it was lying on some mattresses) in order to do this, as the instructions said to turn it on its head, and I bet that would’ve broken our joint between the new and old part of the headboard. We put the wooden pegs in the sides of the headboard first (not in the sides, per the instructions), as we had to make sure they would go in through all the layers of materials first. I also forgot and had covered up one of the big holes in the back with fabric, so I had to dig that out with a screwdriver and scissors on the fly while my husband held it all up… THEN we put the sides on, screwed in the big screws on the side and WHEW! There we were! By the way: I hadn’t really stapled down the bottom of the corners on the headboard, so I just tucked them under as we put on the sides so they got stuck in there. Nobody’s ever going to see it, anyhow. It’ll be covered up by the mattresses.
10. Stabilize the sides – I added the stabilizing metal part of the assembly so that the two sides weren’t just waving in the wind. (Not anything I made up – it’s just part of the normal assembly.)

11. ERRATA!!! Look back in horror and realize the headboard’s way too big…

own version is the height I THOUGHT it would reach before assembly. Note the Dyson vacuum cleaner for scale. ugh.
Um, it was only when we put the whole thing together and then sat it up that I realized how GYNORMOUS this thing had turned out. I decided to put ALL the pieces together (with mattresses) to make a decision. I still wanted to cry after looking at this behemoth in my little baby’s room. WAAAAAAAH! “Measure three times, cut/construct ONCE.” Why do I not listen to myself?? I was winging it way too much on this project. Haste definitely makes waste – a waste of time and energy! At least I hope someone can learn from my mistakes. I didn’t count in my measurements that the back (headboard) would be assembled about 40cm higher up than the sides – it doesn’t rest on the floor… waaaaah!
Soooo, I had to cut the top on the “new” part of the headboard, un-stabilize it on the back, un-peg it, drag it downstairs to the basement, CUT IT AGAIN, re-drill holes for pegs, sand it all, then drag it back upstairs and re-staple the middle part AGAIN. waaaaaaaaaaaaaaaah!!!! Why, you ask? Because of the curves, I couldn’t just recut the back and use the (limited) fabric I had, as it wouldn’t be wide enough now for the “new” top, if I did… Sadness. Here is the first GYNORMOUS version, and then there it is in its final version, with a “seam” in the middle. I ended up making some leftover batting into a roll that I then covered with material to make a big fat piping to cover the joint there, but I have only stuck it in there for now; I’ve since decided to take that off and just deal with the fold. It looks pretty home-made (crappy), but I’m tired at this point. Making piping is not easy. I was thinking of just rebatting and recovering the whole damn thing again, but I don’t have any more of this fabric, and I’ve already painstakingly covered the back of the trundle part below with this fabric. Grrr. They wouldn’t match and I don’t feel like going through that fresh hell one more time.

——————-

12. Sand down sides of trundle front & upholster
-
sanded down frontispiece -
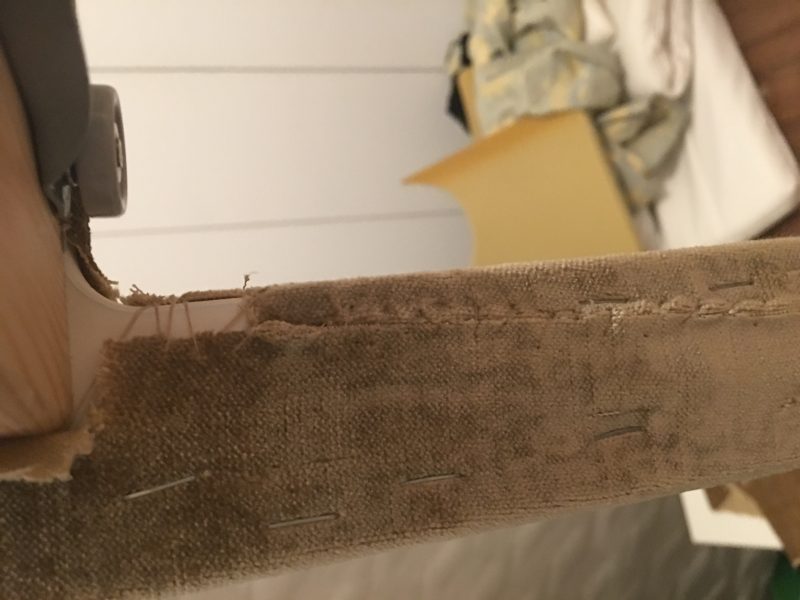
Sewn up in the back since staples wouldn’t go through MDF -

Had to use tacks to attach since MDF only bent the staples! -

repair on end of velvet piece -

joints I sewed before putting on -

-
-

-
-

-
-
-

-

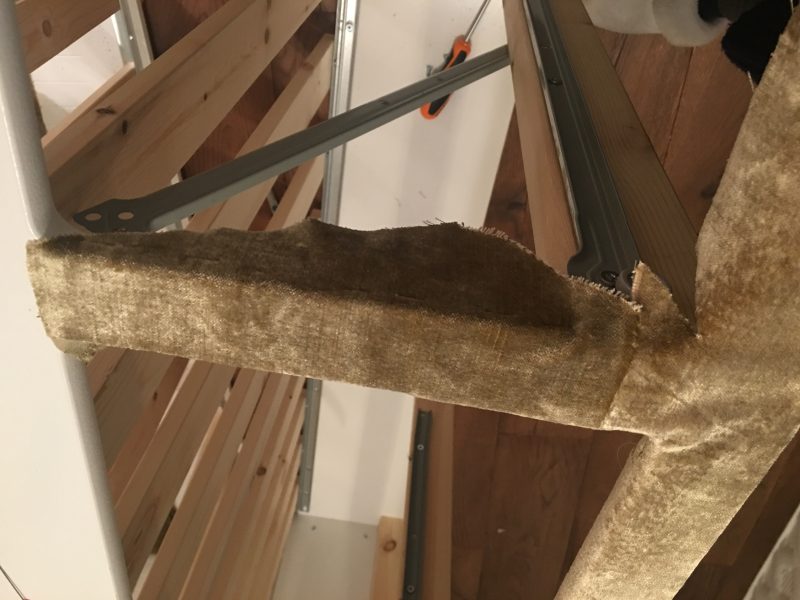
I decided to cut down the front part of the drawers/trundle, as I didn’t like the sides that came up. Here’s the sanded down frontispiece on the trundle and then below, all the upholstering on it. The MDF was SO hard on this piece that it was virtually impossible to use staples on it. They just BENT instead of going in. So I used tacks and my fabulous friend Helena SEWED TOGETHER the other pieces in the back where you won’t see the sewing. Since I had only bits and pieces left of the velvet, I had to Frankenstein a bit of it together in pieces to cover the whole frontispiece. Here, fabric glue was my friend… For this part, I did NOT use any “stuffing” of any kind – I just applied the velvet directly onto the piece. No foam and no batting. It was too hard to attach anything to this piece of MDF for some reason.
13. Add width to front of arms so I can add decorative bronze pieces:

Well, I had these great floral bronze pieces I had found at a market (Art Nouveau! Art Nouveau!) but the front of the Ikea Hemnes sides were about 3cm too skinny for me to nail or screw them in. The decorative pieces have four holes in the corners, not in the middle, unfortunately. I needed WOOD to screw them into since I couldn’t just screw them into upholstery foam, darn it! So I cut off a piece of wood and added it to the front of the “arms” so I could stabilize my little floral piece (which of course I never ended up putting on there…) I guess I could eventually add them on there if I decided I needed something to do. haha!


14. Upholster sides –


Then, I was able to upholster the sides finally. I put foam on the outside of the arms, and lightly stapled it over the top and the added side piece to give a bit more of a rounded edge there. Then I covered that with batting and stapled the crap out of it on all sides. Then I covered it with the damask material. I ended up sewing the front seam of the damask of the arms with a curved needle, as I had no idea how I wanted to close it up with staples without it looking like crap. I DID staple the bottom part which is on the inside behind the drawer/trundle on the interior of the legs.
-

sewing up the arms -

pinned the top first to get the pleats right. -

curved upholstery needle
15. Upholster front of drawers – I decided it would be too much bulk to put batting on the front of the drawers before upholstering them, so I just upholstered them directly on the drawers, stapling them in the back. It took some futzing to figure out the best setup of the pattern with the knobs, but I think it turned out ok. Don’t ask my how I did the corners, as they are majorly jimmied. I sprayed a lot of spray adhesive onto the corners before pulling them tight, and also sprayed the interior edges, so they won’t come up when the drawers are sliding in and out. This is another piece with SUPER TOUGH MDF.
-

view from the back of the front piece of the drawer before assembly -

corner of retro of front of drawer
16. Add decorative pull knobs –


I found these at Zara Home – and they were even on sale for 1.99 per pair! Yay! Create a small hole in the fabric, stick the thing through and brace it with a washer and nut on the other side. Then pull it out and CUT IT DOWN, since you will forever be catching your linens on the post sticking into the drawer if you don’t. For good measure (since I have a toddler and this is ostensibly his bed), add some super glue to the bolt on other side, because I KNOW he will twiddle on the darn thing and it will come loose if I don’t.
17. Cleaning up: Before you think you’ve finished everything, I’d urge you to go back over the edges of your upholstery staples with a hammer and make sure you don’t have any edges of the staples sticking up. Hammer those puppies down so nobody scrapes up their fingers when they try to move the bed or your houseguests are doing something interesting while holding on to the headboard. 😉 Safety first! You may want to glue-gun down some trimming on top of the seams, just for good measure.
18. THE BACK
I decided to REDO the back of the whole bed, as the big boards I had braced it with were actually not so straight, so they were coming up on a couple of sides. Not cool. So I found some METAL braces (they couldn’t find me really long ones) and I doubled them up so they would be stronger, and screwed them in. Then you have to figure out if you want to “clean up” the back of the headboard with some kind of upholstery, as well, too. For this, you could staple some more batting on and add another layer of fabric on the back with Curve-Ease. I decided I just needed to finish the project, so I haven’t finished off the back yet. But what I WANT TO DO is staple some batting and other material on there, tucking the ends in as I staple. Then put a cord around the whole edge where there were staples so no one would cut their fingers on staples and just hot glue that sucker on there. VOILÀ!!! (not “wallah,” as some people on blogs seem to think! It’s FRENCH, people!) That Foreign Language degree comes in handy every now and then for extra snarkiness! But this, alas, remains to be done. Luckily, no one is seeing it.
20. PICTURES COMING SOON OF THE THING ALL GUSSIED UP AND FINISHED!!
I might also make a mattress cover out of the damask material, just by adding some elastic around the corners so it will hang correctly in the front, so stay tuned! And hopefully I will find some kind of solution to cover up the horrible seam across the middle of the velvet headboard, as I really don’t like the current stuck-on bad piping I’ve made. Ideas are welcome! (Put in comments below!)
My eventual goal is to put a bunk bed above this, using it as a platform, and put the small kid bed up there on it. And probably use my extra material left over from this to add some upholstery to that. I have my eye on a good option from Ikea. Any ideas welcome! 😉
- STUFF I USED TO DO ALL THIS:
- Philips head screwdriver
- hammer
- circular saw
- electric sander (actually an “alternative saw” with sander attachment)
- jigsaw
- brackets
- screws
- nails
- wooden pegs
- drill + bits (also used as screwdriver in some instances)
- Big plywood pieces, smaller plywood pieces
- Curve-ease
- 4cm Foam (EXPENSIVE! GAA!!)
- Polyester batting
- upholstery material
- studs (also expensive!)
- butcher paper
- cardboard
- mallet
- staple gun (best if electric, but I didn’t have that)
- lots of staples
- needle-nose pliers (to take out staples – believe me, you’ll need it)
- Regular screwdriver head to pull up staples that aren’t right
- heavy duty scissors
- fabric scissors
- upholstery needle (half circle), strong thread
- lots of patience and a saint of a husband
- Ikea Hemnes bed and instructions